
Showing posts with label Slider Card. Show all posts
Showing posts with label Slider Card. Show all posts
Oct 27, 2017
Unleash Your Inner Beast
Hallo, ihr Lieben! Ich bin zurück mit einer Color Slider-Karte. Ich liebe ja interaktive Karten, obwohl ich sie nicht sehr oft mache (mal abgesehen von Schüttelkarten).

Für diese Karte habe ich das Stanzenset von Lawn Fawn verwendet, die es super einfach macht, solche Karten zu erstellen. Und für das "Innere" der Color Slider-Karte habe ich ein sehr süßes Set von My Favorite Things verwendet (siehe Links unten).

Ich habe also zunächst alle Stanzteile
aus weißem Karton mit dem Lawn Fawn Set ausgestanzt. Auf den Teil, der
sich dann am Ende herausziehen lässt, habe ich das Sentiment "Unleash
Your Innen Beast" gestempelt, da es perfekt zu dem "Innenteil" passt.
Nämlich einen süßen Tiger, der eben genau das versucht: sein inneres
Biest zu entfesseln.
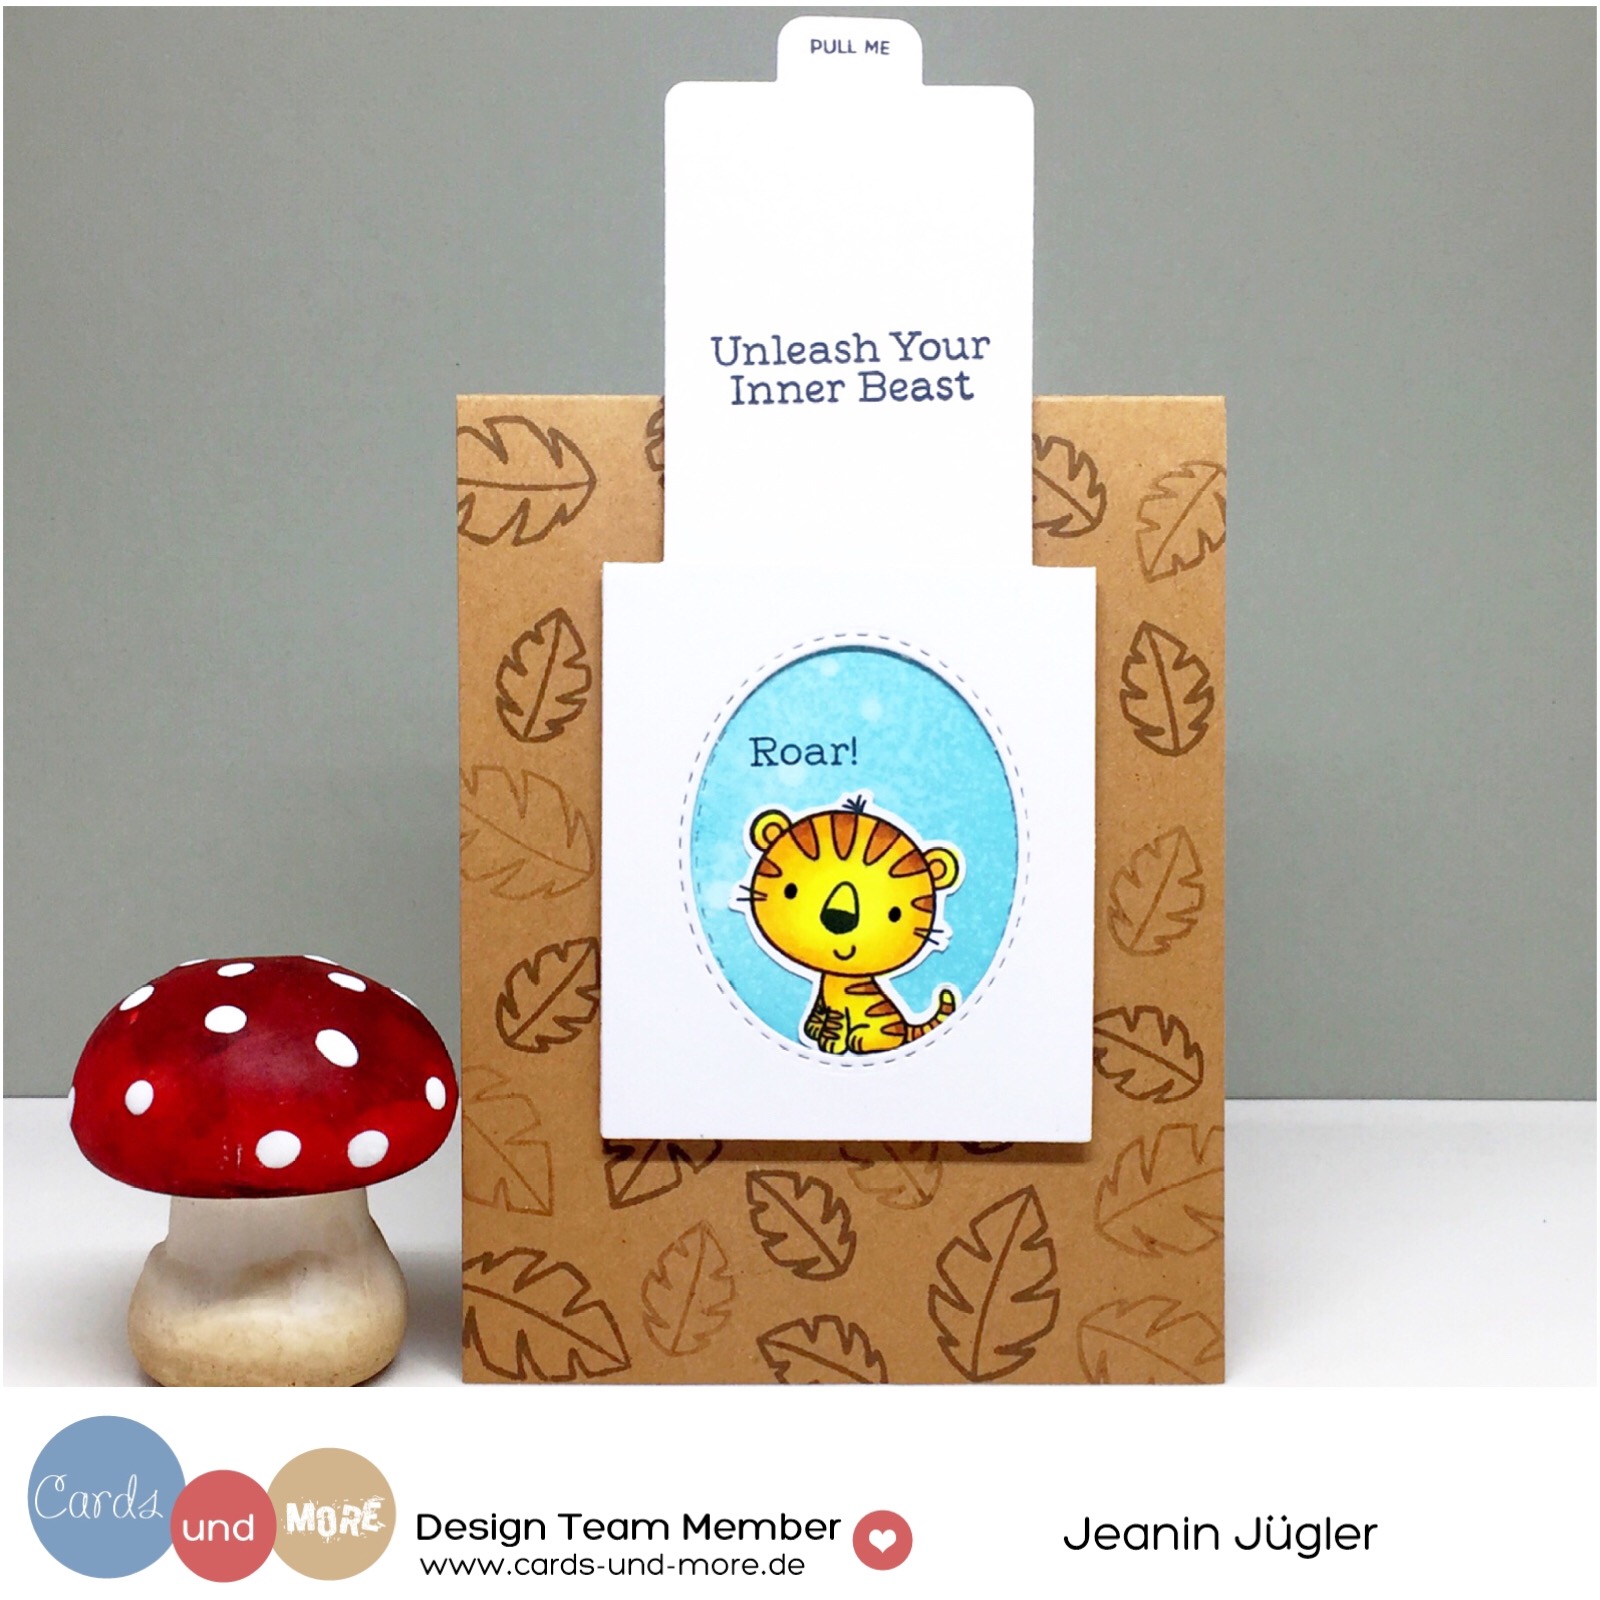
Den Leoparden habe ich mit Alkoholmarkern koloriert und der Hintergrund
ist ein Überbleibsel eines Panels, das ich mit Oxide Inks erstellt habe.
So kann man sehr gut auch kleine Stanzteile aus vorherigen Projekten
verwerten. Das "Roar!" durfte natürlich nicht fehlen. Man möchte ja
immerhin überzeugend wirken ;)

Für den Hintergrund habe ich eine Kartenbasis aus Kraftpapier zugeschnitten. Und passend zum Leoparden habe ich zwei verschieden große Blätter verwendet und diese mit brauner Tinte gestempelt. Den helleren Abdruck habe ich erhalten, indem ich die Stempel einfach ein zweites mal abgespempelt habe (second generation stamping).

Ich hoffe, euch hat diese Karte gefallen und ihr zaubert bald auch mal wieder eine interaktive Karte. Habt ein schönes Wochenende!

Produkte aus dem Shop
 d
d


May 23, 2016
Create A Scene (Craftin Desert Divas Linky Party)


Hello friends! The theme for this Linky Party at Craftin Desert Divas is
"Create A Scene"! We would love to see all of your projects that fit this
theme! So go ahead and craft it and link it up on the Craftin Desert Diva's Blog.
Every other Monday will mark the beginning of a new semi-weekly Linky Party over
at the CDD blog. We hope you will share your projects with us! And don't forget
about the prizes! Every Linky Party will have a winner and a Top 3!
The more times you link up...the more chances you have to win!!
Our Sponsors for this Linky Party are:


For this Linky Party I wanted to create a fun slider card using the Adventure Awaits and Adventure Land stamp sets! I had so much fun creating a galaxy Sneak Peek project for the new release that I wanted to make another one!
Iused the astronaut from the Adventure Awaits set as well as the rocket and planet from the Adventure Land set, stamped them on watercolor cardstock
and colored them in with Zig Clean Color Real Brush markers.

For the background, I started off applying Fossilized Amber, Pink Raspberry, Tilted Violet, Chipped Sapphire, and Black Soot to mix media cardstock. Then, I spritzed it with water. Since the ink reacts with water it will
be lifted off when dabbing the water away. This was the first layer of
stars. I also used white acrylic paint, Perfect Pearls "Pearl" and
Gansai Tambi #95 and spritzed it on the panel with a brush. After
everything was dry, I die cut it with the largest scallop frame from the
Fancy Frame die set.
To create the slider part of the card, I used an x-acto knife and cut out a strip from the center of the background. The strip had to be a bit smaller than the 1 cent piece I was going to use. To create the needed dimension, I used a few layers of foam tape all around the cut out strip and the rest of the panel. The cent piece needs a little bit of room to move around easily.

I adhered down the cut out strip to a white notecard and also adhered
the background panel, making sure to include the cent piece behind it.
On top of the cent piece, I glued a small 3D foam square to which I was
able to adhere the little astronaut.
I found the perfect
sentiment in the "Wishful thoughts" stamp set: "Wishing you were here
with me". I stamped it with VersaMark ink on black cardstock and
embossed it with white embossing powder. I cut the cardstock down to a
strip and die cut it with the fancy frame die so the borders would match
with the background panel. To finish the scene, I adhered the rocket
and the planet to the card.
Here are all the CDD products I used:


Subscribe to:
Posts (Atom)