
Mar 18, 2016
Coffee Lovers Blog Hop
Hello everyone! Today I am taking part at the Spring Coffee Lovers Bloghop for DeNami Design. I am super happy to show you the project that I've made.

I started stamping the donut, pedestal and owl in a cup with Memento Tuxedo Black Ink on Neenah Solar White cardstock and colored in the images with Spectrum Noir markers.
I then went ahead a prared the background pieces. I chose cross-stitched rectangle dies and die cut two panels. The larger one I cut from dark blue cardstock and the smaller one from white cardstock. On the smaller panel, I stamped the little coffee cup randomly with gray pigment ink keeping in mind not to stamp it over the whole space.

After the pigment ink was dry, I adhered the white panel to the larger dark blue panel and adhered the whole thing to a standard white notecard. Using liquid glue I first adhered the owl in a cup to the pedestal and placed the donut right next to it. To give the whole thing a bit more dimension, I used 3D foam squares and adhered it in the center of the card.
For finishing touches I tried the Nuvo Crystal Drops for the first time. I chose the Midnight Blue color because it matched the blue panel. I am still not too good in placing enamels/sequins at the right place of a card but I think it's alright how it looks.
Thank you for stopping by and I hope you liked my project that I created for this blog hop.


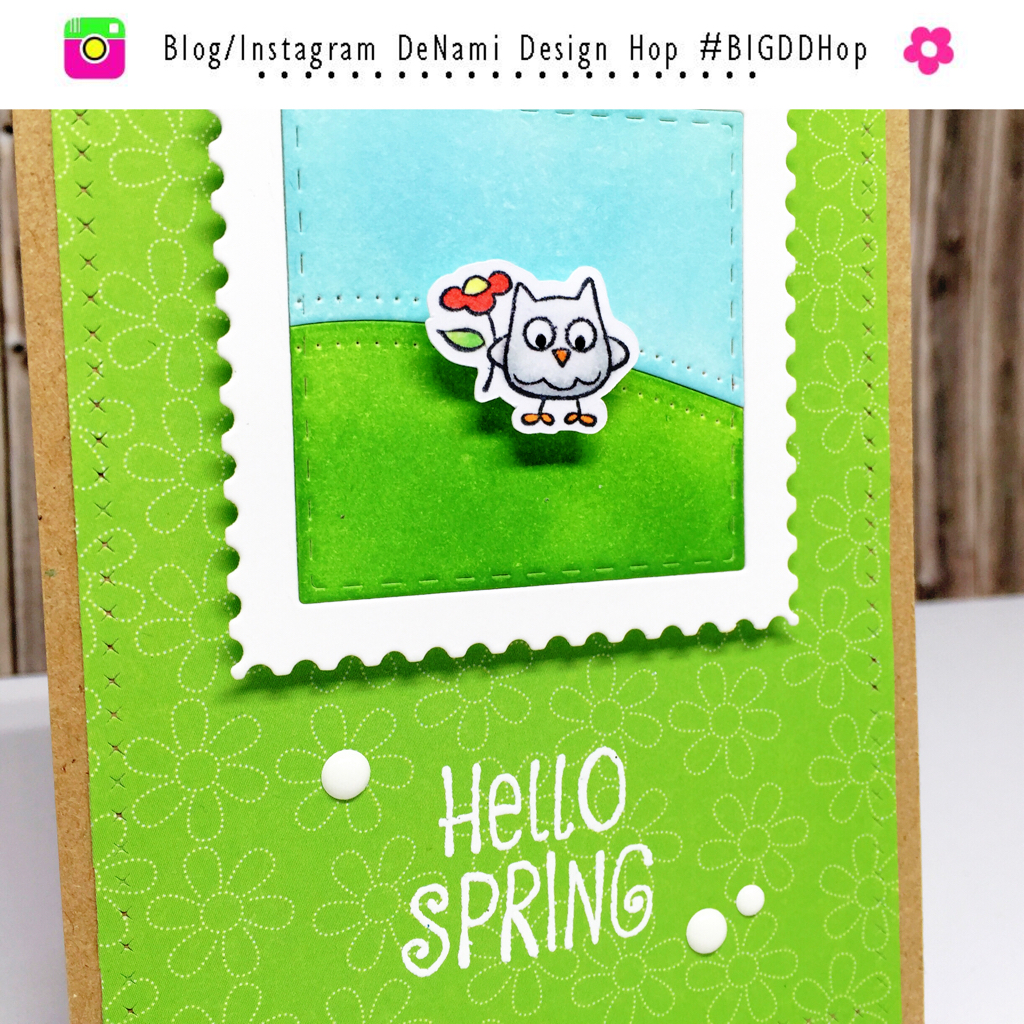
Spring Fling Instagram/Blog Hop (DeNami Design)
Welcome to the DeNami Blog/Instagram Hop (#BIGDDHop) hosted by DeNami!
DeNami will be giving away a $50 gift certificate on the Instagram Hop and a bonus $20 on the blog hop! Be sure to join both for more chances to win!
To enter the blog $20 giveaway, you must GO to each blog and COMMENT on each of them. You will be given the next stop. It should make a loop and you will end up back here.

Thanks for stopping by! Your next stop will be to Daniela Dobson's blog. Be sure to let her know you stopped by by leaving her a comment!
If you want to start from the beginning, you can start at the DeNami blog HERE.
For more added fun, join the hop on Instagram and enter to win a $50 gift certificate from DeNami. The hop begins today and will go on until Friday, March 25th. A winner will be announced on Friday, April 1. The Instagram profiles are listed below. Start at DeNami page and click the picture to know where your next stop will be. The list is below in case you get lost.

To enter, go to Instagram and find the hop graphic and:
1) Like each post
2) Follow each person on it
3) Comment on each stop
For bonus entries:
4) Repost with #BigDDHop and @denamidesign
5) Tag friends (one per line)
Here are all the Instagram Accounts of the hop participants:
DeNami Design Instagram IG @denamidesign
Candi Billman IG @filoeyecandi
Kay Miller IG @kaym2015
Jung AhSang IG @junglebarrya
Lisa Petrella IG @l.petrella
Julia Klein IG @mimizukupapeterie
Elizabeth Gunn IG @elizabethgcreations
Stephanie Klauck IG @sklauck
Sharna Waksmulki IG @littleyellowbirday118
Valerie Ward IG @vjw81e
Amy Tsuruta IG @craftee1
Kay Miller IG @kaym2015
Jung AhSang IG @junglebarrya
Lisa Petrella IG @l.petrella
Julia Klein IG @mimizukupapeterie
Elizabeth Gunn IG @elizabethgcreations
Stephanie Klauck IG @sklauck
Sharna Waksmulki IG @littleyellowbirday118
Valerie Ward IG @vjw81e
Amy Tsuruta IG @craftee1
Thanks for hopping in the DeNami Spring Fling Blog/Instagram Hop!
Be funny/Make a joke (Simply Create Too)
Hello and welcome back to a new Simply Create Too challenge! This time we all created cards to go along the theme "Be funny/Make a joke". And I know it's only March but I thought the image of this cute polar bear dressing as a snowman (or is he eating the snowman???) was just too cute and funny.

I started off stamping the cute polar bear on white cardstock using Memento Tuxedo Black ink and colored him in with Spectrum Noir markers.
Then I created a background with Tumbled Glass Distress ink and die cutting the panel with a pierced rectangle die. To create the snowy hills I also die cut another rectangle from white cardstock and then used the dotted borders by Avery Elle to create two hills. I adhered the larger one directly to the background panel. for the smaller one, the one in the front, I used some fun foam to create a little bit of dimension and adhered it on top of the first snowy hill. I adhedered the polar bear to the hills using 3D foam squares for the top part of him to get the same dimension. I used the German sentiment "Fröhliche Weihnachten" and stamped it with blue ink on the top part of the card.
To finish off the card I cut a piece of dark blue cardstock which matched the color of the sentimnt into place and adhered it to a white notecard. Then I could adhere the rest to the blue panel.
Read more

I started off stamping the cute polar bear on white cardstock using Memento Tuxedo Black ink and colored him in with Spectrum Noir markers.
Then I created a background with Tumbled Glass Distress ink and die cutting the panel with a pierced rectangle die. To create the snowy hills I also die cut another rectangle from white cardstock and then used the dotted borders by Avery Elle to create two hills. I adhered the larger one directly to the background panel. for the smaller one, the one in the front, I used some fun foam to create a little bit of dimension and adhered it on top of the first snowy hill. I adhedered the polar bear to the hills using 3D foam squares for the top part of him to get the same dimension. I used the German sentiment "Fröhliche Weihnachten" and stamped it with blue ink on the top part of the card.
To finish off the card I cut a piece of dark blue cardstock which matched the color of the sentimnt into place and adhered it to a white notecard. Then I could adhere the rest to the blue panel.


Mar 15, 2016
National Craft Month Hop
Hello crafty friends! This month is National Craft Month and I am so happy to be participating in the blog hop by Nicole from Right at Home.
The theme of this blog hop is centered around showcasing our favorite crafty things. I really like distressed background and embossing so I was super happy to try this distress ink lifting technique. I also love these beautiful floral stamps by DeNami Design with which I created my card.

And here is how I made this card:
First off I used Cracked Pistachio and Mermaid Lagoon Distress inks on some mix media paper and blended them together. I didn't have to be too precise with the blending since I was doing a distress ink lifting technique.
After the ink was dry, I stamped the floral stamps with VersaMark in a random pattern on top of the blended background. I embossed the images with clear embossing powder and used my Mini Mister to spray the whole panel with water to get the ink reacting with it. Using a paper towel, I liftet up the ink leaving a weaker pastel color behind. However, in the area of the heat embossing the color was still as vibrant as before.

Then I cut the panel into two pieces and adhered them each two a standard white notecard. This way I was able to create two cards.
To create a little bit more interest, I went ahead and die cut the sentiment "thanks" from silver glitter cardstock as well as white fun foam. I adhered the glittery thanks to the fun foam to create a little bit of dimension. Then I adhered it to the notecard, overlapping with the embossed strip.

I really hope you liked my card and I wish you a happy National Craft Month!
Read more
The theme of this blog hop is centered around showcasing our favorite crafty things. I really like distressed background and embossing so I was super happy to try this distress ink lifting technique. I also love these beautiful floral stamps by DeNami Design with which I created my card.

And here is how I made this card:
First off I used Cracked Pistachio and Mermaid Lagoon Distress inks on some mix media paper and blended them together. I didn't have to be too precise with the blending since I was doing a distress ink lifting technique.
After the ink was dry, I stamped the floral stamps with VersaMark in a random pattern on top of the blended background. I embossed the images with clear embossing powder and used my Mini Mister to spray the whole panel with water to get the ink reacting with it. Using a paper towel, I liftet up the ink leaving a weaker pastel color behind. However, in the area of the heat embossing the color was still as vibrant as before.

Then I cut the panel into two pieces and adhered them each two a standard white notecard. This way I was able to create two cards.
To create a little bit more interest, I went ahead and die cut the sentiment "thanks" from silver glitter cardstock as well as white fun foam. I adhered the glittery thanks to the fun foam to create a little bit of dimension. Then I adhered it to the notecard, overlapping with the embossed strip.

I really hope you liked my card and I wish you a happy National Craft Month!


Mar 14, 2016
Color/Photo Inspiration (Craftin Desert Divas Linky Party)


Hello friends! The theme for this Linky Party at Craftin Desert Divas is
"Color/Photo Inspiration"! We would love to see all of your projects that fit this
theme! So go ahead and craft it and link it up on the Craftin Desert Diva's Blog.
Every other Monday will mark the beginning of a new semi-weekly Linky Party over
at the CDD blog. We hope you will share your projects with us! And don't forget
about the prizes! Every Linky Party will have a winner and a Top 3!
The more times you link up...the more chances you have to win!!
Our Sponsors for this Linky Party are:


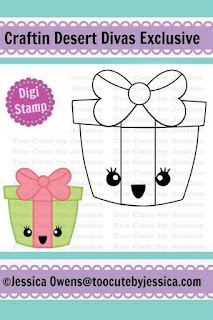
I decided to create a card inspired by the color combo. I started masking off a large stripe in the center of my card. I applied a rich yellow ink with a blending tool. Because I wanted to create a birthday card, I printed the Kawaii Present digi stamp on white cardstock and colored it with Spectrum Noir markers, trying to match the colors of the combo.

To incorporate the blue color as well, I used a birthday sentiment from the Birthday Sentiment digi stamps and printed it also on white cardstock. Because I print my images with a laser printer I am able to apply foil later on. So I went ahead and used a blue/turqoise foil that was closest to the color of the combo. I then cut the sentiment into a strip with a fish tail on one side.
To assemble my card I adhered the present as well as the sentiment strip on top of the yellow stripe using foam tape.
Here are all the CDD products I used:

Subscribe to:
Posts (Atom)