
Jan 22, 2016
Something New (Simply Create Too Challenge Blog)
Dear all, welcome to a new challenge of the Simply Create Too Challenge Blog. The topic of this challenge is "Something New". And since I got a Big Shot for Christmas and bought a few dies to use with, my "something" new will be my Christmas presents :)

I created a bunch of cards that I want to show you today. I started off printing the adorable panda digi stamp from Jessa from Useless Trinkets on Neenah Solar White paper. I colored this cutie in with Spectrum Noir markers (IG6, IG8, IG10; Blender + IG1, IG2; Copic R24, R29, R39 - yes! My first set of Copic Markers!!!) and cut him out with my Brother Scan'N'Cut.
For the background I used a patterned paper from Create A Smiles and cut it into place using Avery Elle double pierced rectangle dies. To highlight the panda a little bit, I decided to cut out a circle (or a part of a circle) from the patterned paper which was large enough to cover the panda. I also went ahead and die cut the "thanks" sentiment from Lawn Fawn from red cardstock about 6-7 times to give it a bit of dimension.
To assemble the card I adhered the patterned paper to a card base and used foam squares to adhere the panda. Using liquid glue I attached all the thanks die cuts and adhered it to the bottom of the card.

Because I had so much fun coloring the panda, I made a few more cards. I again die cut the "thanks" sentiment (this time only once) from white cardstock and also two small panels of light pink and pink mirrow cardstock using the double pierced rectangle die (I also did the same for red and red mirror cardstock). For a bit more interest I dry embossed the mirror cardstock with this beautiful flower pattern and applied a layer of Glossy Accents on the thanks die.


Read more

I created a bunch of cards that I want to show you today. I started off printing the adorable panda digi stamp from Jessa from Useless Trinkets on Neenah Solar White paper. I colored this cutie in with Spectrum Noir markers (IG6, IG8, IG10; Blender + IG1, IG2; Copic R24, R29, R39 - yes! My first set of Copic Markers!!!) and cut him out with my Brother Scan'N'Cut.
For the background I used a patterned paper from Create A Smiles and cut it into place using Avery Elle double pierced rectangle dies. To highlight the panda a little bit, I decided to cut out a circle (or a part of a circle) from the patterned paper which was large enough to cover the panda. I also went ahead and die cut the "thanks" sentiment from Lawn Fawn from red cardstock about 6-7 times to give it a bit of dimension.
To assemble the card I adhered the patterned paper to a card base and used foam squares to adhere the panda. Using liquid glue I attached all the thanks die cuts and adhered it to the bottom of the card.

Because I had so much fun coloring the panda, I made a few more cards. I again die cut the "thanks" sentiment (this time only once) from white cardstock and also two small panels of light pink and pink mirrow cardstock using the double pierced rectangle die (I also did the same for red and red mirror cardstock). For a bit more interest I dry embossed the mirror cardstock with this beautiful flower pattern and applied a layer of Glossy Accents on the thanks die.


Jan 21, 2016
Will you be my valentine? (DeNami Designs)
Today I am showing you this fun and interactive Valentines card. I used the sentiment "Will you be my valentine?" that I printed on vellum and wanted the question to be answered right away. Therefore I came up with the idea to include the answer in the card. The recipient of the card is able to pull on the golden flap on the right side of the card and the "lonely" coffee cup will change into the picture of it and a donut. I think the little heart above the two images lets them seem to be in love. I really liked that.
To create this card I used this heart background that I actually found in a magazine. It has foiled hearts in it and I thought it would be just perfect! I cut out a circle from the paper that was big enough for the second image of the coffee cup and the donut.


I stamped the little coffee cup and the cup and donut on white cardstock and spaced them accordingly. I also stamped the a little donut individually because I thought it would be fun to adhere him near the sentiment as if he is asking the question. I colored the images with alcohol markers.

I adhered the patterned paper to a card base making sure not to apply the adhesive where I wanted the flap to be. At first I wanted the word "yes" to appear on the white flap but I didn't like that and covered it with golden washi tape later.


To finish of my card I adhered the vellum and the little donut to the patterned paper.


DeNami Supplies:
Accessories:
Jan 19, 2016
I love you (Craftin Desert Divas)
Hello and welcome back! Today I created this card using this digi stamp from Craftin Desert Divas. After printing the mouse on Neenah Solar White cardstock, I colored him in with Spectrum Noir markers (mouse: BG1, BG4, BG6, BG8; FS2, FS3, FS4; EB2, GB8; black and white geld pen; trousers: JG1, JG5, JG6; box: CT1, CT2, CT4, EB2; hearts: CR10, DR2, DR6). I also printed the sentiment "I love you" (not included in the digi) on vellum which, I think, gives it a nice and elegant touch.

For the background I wanted to create something bold. Therefore I used Aged Mahogany, Picked Raspberry, Fired Brick and Abandoned Coral Distress ink, pressed them on a slick surface and spritzed them with a combination of water and perfect pearls "Pearl". Then, I used Tim Holtz watercolor cardstock and pressed it in to the ink a couple of times, letting the colors drying in between.

To assemble my card I adhered the watercolor background to a card base and used foam squares to adhered the mouse on the left side of the panel. Before adhering the vellum strip I cut out a little flag on one end.

Jan 17, 2016
Apemazing Birthday!
Hello crafty friends, I am back with another birthday card. I recently watched Jennifer McGuire's video on "stamping with embossing folders". Since I got a big shot and three embossing folder for Christmas I wanted to give it a go.

I used one of the swirly embossing folders I got (unfortunately I can't find it anywhere online. The name that is stated on the embossing folder doesn't seem to be correct) and inked it up with Lily Pad Die ink (maybe pigment ink works better for this technique, I have to try it out). I place a piece of white cardstock in my embossing folder and ran it through my Big Shot. This created a panel with color and dimension.

Because I thought these flourishes looked like vines or something similar I went ahead and stamped this little Monkey from a Lawn Fawn set with Memento Tuxedo Black ink on Neenah Solar White cardstock. I also stamped the large and small leaves and the little flowers. I colored all the images with Spectrum Noir markers (monkey: TN7, TN8, EB5; EB2, GB8, GB10, leaves: JG1, JG6; LG3, LG4, LG5, flower: CT4).

I just got the cool cuts dies from Create A Smile and really wanted to use them. So I cut the sentiment "Alles Liebe zum Geburtstag" from a strip of white cardstock using the individual dies and did the same from green cardstock. Now the fun part began which meant to get the green die cuts into the space of the white strip including all the itzy-bitzy-tiny little white parts.
To finish off the card I adhered the embossed panel to a slightly larger green one and adhered down the sentiment strip. The images were adhered using glue dots and I loved how the tiny flower looked in the "hair" of the monkey :)
Jan 15, 2016
Sneak Peek 08 Anything Goes (Denami Design)
Well crafty friends, it's been a great couple of days showcasing the new spring release for DeNami designs. I hope you liked it as much as I did. Today I will show you another card that goes along with the theme "Anything Goes" .

For this card I used the adorable donut stamp (NEW CL-B124 Happy Donut) and the "Donut Worry be HAPPY" sentiment (NEW CL-E199 Donut Worry). Again, I wanted to use rainbow stamping and I started with red and worked my way up (or down the card) to pink. I stamped the sentiment in the bottom of the panel with black ink and placed the little donuts around it. To finish off this clean and simple card I adhered the panel to a slightly larger piece of black card stock.

Read more

For this card I used the adorable donut stamp (NEW CL-B124 Happy Donut) and the "Donut Worry be HAPPY" sentiment (NEW CL-E199 Donut Worry). Again, I wanted to use rainbow stamping and I started with red and worked my way up (or down the card) to pink. I stamped the sentiment in the bottom of the panel with black ink and placed the little donuts around it. To finish off this clean and simple card I adhered the panel to a slightly larger piece of black card stock.

Lovely Sock Monkey (Craftin Desert Divas)
Hello and welcome back to my blog. Today I have another card for you that I made with a digi stamp from Craftin Desert Divas. I just love this sock monkey. I printed him on Neenah Solar White paper and colored him in with Spectrum Noir markers (monkey: blender, BG1, BG33, BG4, BG6, BG7, scarf and ear muffs: CR10, CR2, CR6, CR7).

For the background I used Canson mixed media paper. I pressed Cracked Pistachio, Pine Needles, Peacock Feathers and Mustard Seed Distress inks on a slick surface, spritzed them with water and pressed my paper into the ink a couple of times, drying it in-between. For the splatters of color I used Gansai Tambi watercolor #30. But somehow I wasn't enjoying the background in combination with the monkey. It was far to bright. So I decided to put some vellum over it. I cut a circle from both the background and the vellum and adhered it together.

I didn't have a sentiment to go with the monkey so I just wrote down the phrase "You're loved" in a nice font, switched the color to a dark red and printed it on vellum. And I really love that look! I cut it into a thin strip and cut out a triangular shape on one side.
To assemble the card I adhered the circle in the center of the card and the sentiment below it on the left side. At first I wanted to place the monkey directly in the center of the circle but it didn't look right for me. When I moved him down a little bit it somehow looked much nicer. For finishing touches I also placed some red enamel stickers on the card.
Jan 14, 2016
Sneak Peek 07 You're One Of A Kind (Denami Design)
Dear
crafty friends, it's already the sixth day of the sneak peek week for Denami Designs! To
see the cards that the rest of the design team made, go check out the DeNami Design blog post.

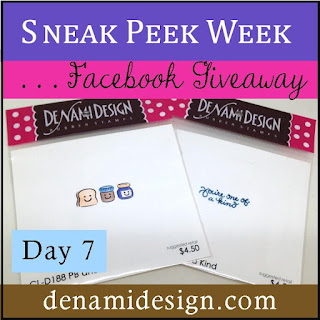
And here is the card for the sixth day of sneak peek week. I used the following products:
CL-D188 PB and J
(I cut the stamp apart to be able to stamp the little images separately)
CL-D189 One of a Kind
CL-D189 One of a Kind

To create this card I cut the PB&J stamp apart so I was able stamp the little images seperately. They are just too cute! First I stamped the sentiment with red ink and the started to stamp the little toast in a circle around it. I did the same with the jelly glass and peanut butter jar. I did that until the whole panel was covered. I used waterproof ink because I wanted to color the images with watercolor markers. To finish off the card I cut the piece a bit smaller and adhered it to a red card stock background panel.

Jan 13, 2016
Sneak Peek 06 Sports Owls (Denami Design)
Dear
crafty friends, it's already the sixth day of the sneak peek week for Denami Designs! To
see the cards that the rest of the design team made, go check out the DeNami Design blog post.

There will also be a givaway each day on Facebook. Just click on the picture below to get directed to the giveaway and get more information.
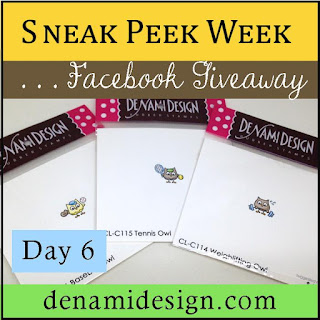
NEW CL-C113 Bicycle Owl
NEW CL-C116 Baseball Owl
NEW CL-C115 Tennis Owl
NEW CL-C114 Weightlifting Owl
NEW CL-C116 Baseball Owl
NEW CL-C115 Tennis Owl
NEW CL-C114 Weightlifting Owl
These cute owls are just adorable! I couldn't decide which ones to use so I tried to use as many as I could. Using a piece of kraft cardstock I cut out four little windows as well as the sentiment "you're my champion" from red cardstock. On watercolor cardstock, I stamped the little owls with waterproof black ink and colored them with watercolor pencils.

To make sure I placed the owls in the right spot, marked the exact positions of the windows with a pencil so I was able to stamp them in the center.


After the coloring was done, I used foam tape on the back of the kraft panel to give it a bit of dimension and adhered it to the watercolor piece. Using liquid glue I also adhered the sentiment on the bottom of the card.


Lovely Snail Mail (Create A Smile Guest Design Call)
Hi crafty friends, I am back with this shaker card. I usually don't like pink but I love it in this card! It's perfect for Valentine's Day!

I started out with the background and used Dusty Concord, Seedless Preserves, and Picked Raspberry Distress inks on Canson Mixed Media Paper, blending the colors together from dark to light. After I was satisfied with the blending, I spritzed it with my Mini Mister which was filled with water and a bit of Perfect Pearls "Pearl" to give it a nice shimmer. I also sprinkled some waterdrops on it and dabbed it of with a paper towel.

To create the shaker card, I die cut a frame from white card stock using Avery Elle Double Pierced Rectangle dies. Behind the frame I adhered some acetate and loads of foam tape to give the panel the needed dimension. I filled the shaker with clear, irridescent beads and little letters from the lovely critters stamp set from Create A Smile stamped with Wild Orchid Dye ink.

To embellish the card I also stamped the adorable snail with Memento Tuxedo Black ink on Neenah Solar White card stock and colored it in with Spectrum Noir markers (EB1, EB2, GB8; PL3, PL4, PL5). I used a gold geld pen to highlight the little heart on its shell.

As a sentiment I used the beautiful "love" stamp and stamped it with Wild Orchid Dye ink as well as the smaller sentiment "sending you". I cut out the word "love" and the "sending you" in the shape of a little banner. I adhered the sentiments as well as the snail with glue dots to the acetate.
You might have already guessed (and if you haven't read the title... ;) ): this is, again, a card for the Create A Smile Guest Designer Call :)

Read more

I started out with the background and used Dusty Concord, Seedless Preserves, and Picked Raspberry Distress inks on Canson Mixed Media Paper, blending the colors together from dark to light. After I was satisfied with the blending, I spritzed it with my Mini Mister which was filled with water and a bit of Perfect Pearls "Pearl" to give it a nice shimmer. I also sprinkled some waterdrops on it and dabbed it of with a paper towel.

To create the shaker card, I die cut a frame from white card stock using Avery Elle Double Pierced Rectangle dies. Behind the frame I adhered some acetate and loads of foam tape to give the panel the needed dimension. I filled the shaker with clear, irridescent beads and little letters from the lovely critters stamp set from Create A Smile stamped with Wild Orchid Dye ink.

To embellish the card I also stamped the adorable snail with Memento Tuxedo Black ink on Neenah Solar White card stock and colored it in with Spectrum Noir markers (EB1, EB2, GB8; PL3, PL4, PL5). I used a gold geld pen to highlight the little heart on its shell.

As a sentiment I used the beautiful "love" stamp and stamped it with Wild Orchid Dye ink as well as the smaller sentiment "sending you". I cut out the word "love" and the "sending you" in the shape of a little banner. I adhered the sentiments as well as the snail with glue dots to the acetate.
You might have already guessed (and if you haven't read the title... ;) ): this is, again, a card for the Create A Smile Guest Designer Call :)
Subscribe to:
Posts (Atom)