
Showing posts with label Digi Stamp. Show all posts
Showing posts with label Digi Stamp. Show all posts
Jun 25, 2017
Wishing you a lifetime of happiness
Hi everyone, this is my last post as a design team member for Craftin Desert Divas. I've decided to step down for the upcoming term but I had such a wonderful time at this incredible and talented team!
For my final card I created a rather unusual one for this time of year. But I guess everybody needs some cooling down during these hot summer months. I printed these cute penguins on some mix media card stock and colored them in with Zig markers.

I decided to create a distressed background using different shades of blue. I then die cut the distressed card stock with the medium square of the Inside Scalloped Square dies and keep both the frame as well as the inside piece. Using some foam tape, I adhered the square on a standard white card base and also adhered the penguins in the center.

To finish off the card, I stamped the sentiment "Wishing you a lifetime of happiness" with black ink below the square.

I hope you enjoyed this last card from me. Have a great day!
CDD products used


Mar 27, 2017
Treasure Trolls
Hi everyone, I am back with a card featuring the Treasure Trolls stamp set by Craftin Desert Divas.


Read more

I started off stamping the little troll on mixed media card stock and colored her in with Zig Clean Color Real Brush markers. I then went ahead and printed off the digi mine stamp on mixed media card stock and also colored in the background with the same markers.
For the outer frame, I used the largest Inside Scalloped Circle die and die cut it from white card stock to create a contrast to the dark mine background. Using the circle die from the Stitched in Circle die set, I die cut the background and also a standard card base making sure to let the die hang over the folded line to create a circle shaped card base.

Now everything that was left to do was to assemble the card. I adhered the background to the circle shaped card base. Using liquid glue, I then adhered the outer frame on top (it's a bit larger than the card base but not too extreme). To adhere the troll I used 3D foam squares and placed her next to the tracks.
Thank you so much for stopping by! See you soon!
Mar 24, 2017
Coffee Lovers Spring Blog Hop
Hi everyone and thank you for stopping by! I created this card for the Spring Coffee Lovers Bloghop which is starting today and lasts for a whole week!

I used one of the many coffee themed digis by Craftin Desert Divas that are available on their website. How do you like the Unicorn Cup digi stamp?


Here are some of the coffee themed digis that you can purchase from the Craftin Desert Divas Website.

And you can get the Thanks a Latte Bunny for free during the Coffee Lovers Bloghop! Simply use the Code CLBH in the CDD Shop to get it.

Have fun hopping!
Read more

I used one of the many coffee themed digis by Craftin Desert Divas that are available on their website. How do you like the Unicorn Cup digi stamp?


Here are some of the coffee themed digis that you can purchase from the Craftin Desert Divas Website.
And you can get the Thanks a Latte Bunny for free during the Coffee Lovers Bloghop! Simply use the Code CLBH in the CDD Shop to get it.
Have fun hopping!
Mar 9, 2017
See-Trough Shaker Card
Hi everyone, I am back with this fun shaker card. I started off printing the racoons on some mixed media card stock with a laser printer and colored them in with Zig Clean Color Real Brush markers.

Then I made the shaker pocket using some thin plastic sheets and the fuse tool. Before sealing all four sides, I filled the pocket with the Sweet Sixteen sequins and the cute racoons.
Using the largest Fancy Frame die, I die cut the front of a card base so I'd get two nice sides with a scalloped edge. Using strong adhesive, I simply adhered the shaker pocket to the back side of the top and bottom card base piece.

I hope you enjoyed this shaker card and that I could inspire you to make your own.
CDD products used


Nov 25, 2016
DIY Christmas Ornaments
Hi everyone, I am back with another fun project. I was at a craft fair a couple of weeks ago and found these clear acrylic Christmas ornaments and thought that it would be a fun crafty project to decorate them with moss and stamped images. So I went outside to get some moss and dried it for a couple of days. I chose the adorable Waddle and Jingle digi stamps by Craftin Desert Divas to include in the ornaments.

So I downsized the images so they would easily fit in the ornaments and because I wanted the images to be on both sides, I mirrored them and printed two versions for each ornament. Then I colored them with alcohol markers. Since the images were really small I only did some basic coloring without much shading (apart from the penguin's hat). After fuzzy cutting the images (or rather let them be fuzzy cut by my cutting machine) I adhered the original and mirrored images together.

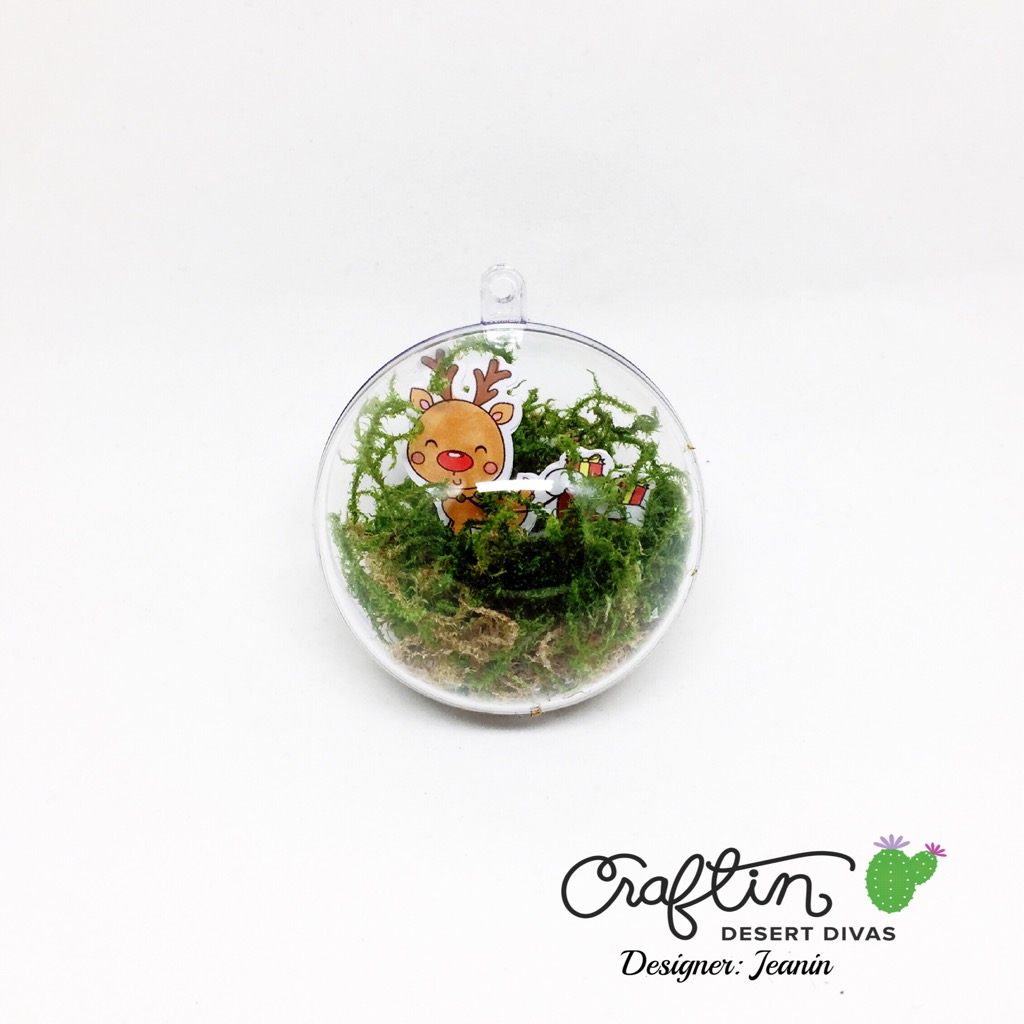
I cut the moss in place and glued each image on top using a hot glue gun. Then I cut easily place the moss and the image in my Christmas ornament.


I really hope you like this idea and give it a try. These would also make perfect Christmas gifts. See you soon!
Oct 30, 2016
New Digi Stamps - Flamenco Mice
Hi everyone and welcome back to our blog hop introducing the new digi stamps "Flamenco Mice". You can download the digi stamps on the Digi Stamps download page. It includes a female mouse with and without the flower, and a male mouse with and without the rose as well as some accessories (a handfan, maracas, and a rose). There are also some sentiments in different fonts so you can choose whatever you prefer for your projects.


For the second card I used the boy mouse and also colored him and the extra rose with Spectrum Noir markers. I love how you can group both images together but how you can also used them separately. I especially like the "Hola chica" sentiment to go with the boy mouse.


And I asked some amazing crafty friends to create some projects to showcase the new digis. Please hop along and leave them some kind words :)
Please note: If you create any projects with these digi stamps and post them on your blog, please link back to my blog.
Read more

Here are two cards that I made with the new digi stamps. For the first card I used the girl mouse and colored her with Spectrum Noir markers. I also colored the hand fan and the maracas.


For the second card I used the boy mouse and also colored him and the extra rose with Spectrum Noir markers. I love how you can group both images together but how you can also used them separately. I especially like the "Hola chica" sentiment to go with the boy mouse.


And I asked some amazing crafty friends to create some projects to showcase the new digis. Please hop along and leave them some kind words :)
>>Jeanin<<
Nina
Ruth
Vanessa
You can also download all digi stamps as a ZIP file here.
Jul 8, 2016
Red, White or Blue (Simply Create Too Challenge Blog)
Hey everyone, it's time for a new challenge at the Simply Create Too Challenge Blog. The theme for this challenge is "Red, White or Blue" and I've decided to go with red and white.

I created a show set of cards with the new fox digi that you can download here. I colored him in with Zig Clean Color Real Brush pens. I also wanted to use two panels for my card, so I die cut the larger one from red card stock and a smaller one from white card stock using dies by Craftin Desert Divas.
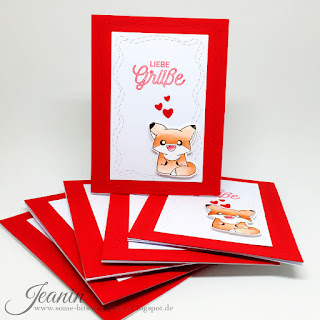
For my sentiment I used the stamp "liebe Grüße" from Create A Smile and stamped it with Memento Lady Bug ink in the top center of the white panel. Using 3D foam squares, I adhered the little fox to the bottom right corner and die cut a few hearts from red card stock and adhered them with glue dots above him.
I hope you enjoyed these cards and I am looking forward to seeing your creations on the blog. Take care!
Read more

I created a show set of cards with the new fox digi that you can download here. I colored him in with Zig Clean Color Real Brush pens. I also wanted to use two panels for my card, so I die cut the larger one from red card stock and a smaller one from white card stock using dies by Craftin Desert Divas.

For my sentiment I used the stamp "liebe Grüße" from Create A Smile and stamped it with Memento Lady Bug ink in the top center of the white panel. Using 3D foam squares, I adhered the little fox to the bottom right corner and die cut a few hearts from red card stock and adhered them with glue dots above him.
I hope you enjoyed these cards and I am looking forward to seeing your creations on the blog. Take care!


Jun 18, 2016
Forest Animals Digi Stamps Blog Hop
*UPDATE* You can now link you created projects with the digi stamps to an Link-Up Tool. You click here to get redirected to the Digi Stamp Page. You can find the Link-Up Tool on the bottom of the page.

Hello everyone and thank you for joining us on the this beautiful day! I've met so many wonderful people on Instagram and I saw that some of them started to create digi stamps. They are so talented and created so many amazing and fun stuff that I wanted to give it a go myself.
I drew a lot when I was younger, especially in high school, but stopped when I went to university. Card making has brought me a bit closer to being creative again and after all the wonderful inspiration, here are the first digi stamps I created myself. I still have so much to learn but for now I am super happy with the outcome. Some of you may know that I am a sucker for foxes. So this is what I drew first. And then the idea started to form to create a few forest animals.
I've asked some very talented girls I met on Instagram if they might be interested in working with my digi stamps and create some projects with them so we can all give you some inspiration. And I am super excited for you to see their beautiful creations! You will find the blog hop line up below. But for now I wanted to show you the cards I created. I hope you'll have a lot of fun hopping along! You will also find the download link to all digi stamps and coordinating sentiments below. Enjoy!


If you like what you see, it would mean so much to me if you'd follow my blog and the blogs of my talented crafty friends. Thank you very much!
The next stop is the super talented Birka
Blog Hop Line Up
> Jeanin <
You can download all digi stamps as a ZIP file here:
Mar 14, 2016
Color/Photo Inspiration (Craftin Desert Divas Linky Party)


Hello friends! The theme for this Linky Party at Craftin Desert Divas is
"Color/Photo Inspiration"! We would love to see all of your projects that fit this
theme! So go ahead and craft it and link it up on the Craftin Desert Diva's Blog.
Every other Monday will mark the beginning of a new semi-weekly Linky Party over
at the CDD blog. We hope you will share your projects with us! And don't forget
about the prizes! Every Linky Party will have a winner and a Top 3!
The more times you link up...the more chances you have to win!!
Our Sponsors for this Linky Party are:


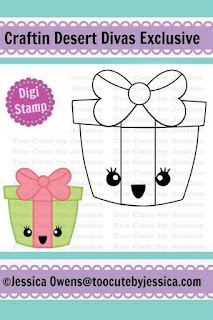
I decided to create a card inspired by the color combo. I started masking off a large stripe in the center of my card. I applied a rich yellow ink with a blending tool. Because I wanted to create a birthday card, I printed the Kawaii Present digi stamp on white cardstock and colored it with Spectrum Noir markers, trying to match the colors of the combo.

To incorporate the blue color as well, I used a birthday sentiment from the Birthday Sentiment digi stamps and printed it also on white cardstock. Because I print my images with a laser printer I am able to apply foil later on. So I went ahead and used a blue/turqoise foil that was closest to the color of the combo. I then cut the sentiment into a strip with a fish tail on one side.
To assemble my card I adhered the present as well as the sentiment strip on top of the yellow stripe using foam tape.
Here are all the CDD products I used:

Subscribe to:
Posts (Atom)